Monday, May 30, 2016

Creative Heart Monday - Gel Print Scrap Flowers


Yep.....I'm starting with my Gel Press print scraps again!  Today it's a vase of flowers.  There are lots of flowers blooming in my yard and I love it.  My vegetables....eh....not so great.  We had a lot of rain and they hated it.  As my, late, father-in-law would say...."whatta ya gonna do".  So.....

here we go...........


List of Supplies

11" X 13" Canvas
Gel Press print scraps
Donna Downey Anemone Stencils
Liquitex Basics Acrylic Paint - Black
DecoArt Media Fluid Acrylics - Titan Buff
Oil Pastels - Pink, Purple, White
Black Charcoal Pencil
Pigma Micron Black Pen


Have a great Monday and a wonderful week.

PEACE!!

Cyndi

FYI - Want a bonus chance to win a prize from Gel Press™?  Between now and Father's Day (June 19, 2016) create your own "Just For Him" project and post it on our Facebook page Gel Press Junkies!  Everyone that plays along will be entered in a drawing as well.  Yes, we would love you to use a Gel Press™ in your entry- but you don't have to! Just make a fabulous project featuring Fathers Day and post it!  Maybe you will win a Gel Press™! 
To Qualify for the drawing: 
1) You may enter a maximum of 3 times with individual projects.
2) You must by 18 years old.
3) You must live in the USA.
4) Mentioning other products or other companies in your post disqualifies your project.

Thursday, May 26, 2016

Father's Day Cigar Box with Gel Press™


Welcome to our "Just For Him" blog hop with Gel Press™!  Please take time to hop through all the great blogs of our designers for inspiration.  Then go the the Gel Press Blog and leave a comment as to which blog gave you the most inspiration!  We will draw a random winner from the comments to win a prize from Gel Press™!!!

Most of my art is bright, flowery, whimsical, etc.  Since, it's Father's Day, it's time to do something a little more masculine.

Every man needs a little box on his dresser to keep his keys, phone, money.....and pictures of you, of course.  My husband and I do not have any children....but he is the father to our doggie and two chickens.

Here's my take on a "man" box.


List of Supplies

8" X 8" box from the craft store (I removed the latch from the front because I know my husband and he can't be bothered with latches)
Americana Acrylic Paints - Raw Umber, Mustard Seed, Bleached Sand, Titanium White
DecoArt Media Fluid Acrylics - Quinacridone Magenta, Quinacridone Red
Regular White Paper
Brayer
12" X 14" Gel Press™ Plate
Woodgrain tool
Scrapbook paper (I chose one with stamps and one with a map of Europe)
Decou-Page Matte Medium
Book pages
Ranger Black Archival Ink
Black Pens
Mixwax Polyurathane - Glossy


Make the Gel Press™ Prints

Three "Woodgrain" prints. 

Dab your base colors on the plate. For this one, I used Mustard Seed and Bleached Sand.


Brayer it out......


And, make a pull.

I made two other base prints, one using Raw Umber, and one using Quinacridone Magenta/Quinacridone Red


Now, dab some Burnt Sienna and Quinacridone Nickel Azo Gold onto the plate......brayer it out.

To achieve the woodrain pattern - Using the woodgrain tool, Run it across the plate in rows to simulate wooden planks.


Put your original print onto the plate, and make a pull.


Do the same thing on the other two prints.  I used Raw Umber over the Magenta/Red base print, and Mustard Seed and Bleached Sand over the Raw Umber base print.

I also made a "one pull" print using Bahama Blue, Ultra Blue Deep, and Titanium White.  (The "teal-ish" print in the photo below was not used in the project.)


For the Sides and Top


Cut the wood grain prints to fit the box.  My box was 8" X 8", so my "wooden planks" were 2.66' X 8"

Measure the sides of the boxes and cut the "stamp" scrapbook paper to fit. Cut little notches in the pieces for the back of the box to allow for the hinges.

Cut the map to size (mine is 4" X 4").....cut book page 1/2 inch larger than the map....and the blue print 1/2 larger than the book page.  Using the Ranger Black Archival Ink, rub along edges of map, Gel Press™ print, and book page, to create an aged look.


Assembly

Adhere the papers to the box with Decou-Page.


Using a black pen, I "painted" all of the tiny, exposed, wood around the edges.

Then adhered the map piece to the top with Decou-Page.

Apply a coat of polyurethane (or a couple coats, if you wish) to the box.


I hope that you enjoyed this project!  Make one for the man in your life.

And......now HOP on over to the next great Gel Press™ project!!

Cyndi - You are here!!
Sandee
Theresa


Want a bonus chance to win a prize from Gel Press™?  Between now and Father's Day (June 19, 2016) create your own "Just For Him" project and post it on our Facebook page Gel Press Junkies!  Everyone that plays along will be entered in a drawing as well.  Yes, we would love you to use a Gel Press™ in your entry- but you don't have to! Just make a fabulous project featuring Fathers Day and post it!  Maybe you will win a Gel Press™! 
To Qualify for the drawing: 
1) You may enter a maximum of 3 times with individual projects.
2) You must by 18 years old.
3) You must live in the USA.
4) Mentioning other products or other companies in your post disqualifies your project.


PEACE!!

Cyndi
Gel Press™ Creative Design Team

Check out my Facebook Group - Mixed Media Passion.  I would love to see your art!!

Wednesday, May 25, 2016

How to Make a Rubber Stamp Cube

Here's the second video in my "Tips and Techniques" series.

This is a super, simple way to make six rubber stamps of your own design.

I love to use rubber stamps to add texture to my paintings, make imprints in Gel Press™ prints, background paper for cards, etc.  You can use this rubber stamp block with ink or paint.

Here we go........


I hope that you are having a wonderful day!

PEACE!!

Cyndi

FYI - Be on the lookout for my Father's Day post, this Friday 5/27 and a new project on the Gel Press Blog on 6/3!!

Monday, May 23, 2016

Creative Heart Monday - Field of Flowers using Oil Paint Sticks


Happy Creative Heart Monday!!

This week I'm giving the R&F Oil Paint Sticks another try.  I made a little painting a couple weeks ago, trying out the oil sticks.  Although, they are very easy to use, it does take a little getting used to.  In this project, I used all of the colors that I have (except for black).  It's kind of repetitive, but I wanted to spend some time getting the feel for them.

Oils are very messy, so if you try these - WEAR GLOVES!!

Here we go............


List of Supplies

11" X 13" Canvas
R&F Oil Paint Sticks


See....I told you it was going to be repetitive.  But, I really like them....I just need to keep practicing.


Here's the little piece that I tried a couple weeks ago.


Have a great Monday and a wonderful week.

PEACE!!

Cyndi

Monday, May 16, 2016

Creative Heart Monday - Nighttime Cityscape


I have to be honest.....this is not the, original, project for this week.  I, actually, started a painting using my R&F Oil Paint Sticks.....but, it was taking way too long.  So, I'm putting that one off until next Monday.  I decided to do something a little more familiar to me.....playing with my Gel Press print scraps.  I pulled out a few of my darker prints, made one new one, and.....

Here we go........


Usually, my Gel Press prints are very colorful, but I wanted something a little different this time.  I think that it worked out alright.

List of Supplies

8" X 10" Canvas
Black Liquitex Gesso
Americana Paint - Titanium White, Ultra Blue Deep
DecoArt Media - Cerulean Blue
DecoArt Media Interference Paint - Blue
Scrap Gel Press Prints
Black Charcoal Pencil
White Sakura Gellyroll Pen
Decou-Page Matte Medium


Have a great Monday and a wonderful week.

Oops....I almost forgot....A few days ago, I made a quick video on How to make Collage/Tissue Paper.  I'm going to try to put out weekly (or bi-weekly) videos on little tips and techniques.  If anyone has a cute name for my "tip" videos, let me know.  Also, if anyone can think of a technique that they would like to see, let me know.  I'm not an expert on anything, but I will try just about everything.  I realize that there are tons of videos on YouTube, covering anything that you can think of, but if you ever think of something that you would be interested in seeing.....I'm all ears!!

PEACE!!

Cyndi

Monday, May 9, 2016

How to make collage / tissue paper

I use a lot of different paper to start out my art projects.  A lot of times, I will cover a canvas with book pages, gel prints, etc. to start a background.  I love the Tim Holtz tissue paper for this purpose. However, I'm out of it and they didn't have any at the craft store......so I decided to make some to have on hand.  It' super easy!

In the past, I have used artist tissue paper, deli paper, and tracing paper.  They all work great.  Today, the only thing that I had available was tracing paper.....so that's what I used.  Since I was making it anyway, I thought I would do a little video, in case, anyone would like to see the process.

Here we go.......


You can do this on regular tissue paper, but "artist tissue paper" works a little better.  And....if you do it on big tissue paper sheets, you can use it for wrapping gifts, stuffing gift bags, etc.  I, generally, just rip pieces off and use it as collage paper on my art projects.  When applied to the project with gel medium, the paper becomes, somewhat, transparent and just the stamping shows.  I also use this same process for adding words to canvases.  I have a fear of stamping directly onto a canvas that I've worked on for hours......the letters never go on straight....or, they don't end up looking quirky if that's what I want.  So I stamp onto the tracing paper or tissue paper (getting it the way I want it) then apply it to the project with gel medium.

Hope you're week is off to a good start.

PEACE!!

Cyndi

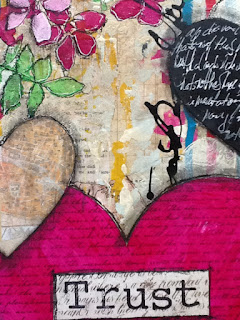
Creative Heart Monday - Trust Your Heart


Happy Monday to all of you Creative Hearts!!

I knew that I wanted to do a piece that was similar to the style that I was doing about six months ago. I had a plan....but, I didn't know that I was going to have such a time filming it.

I've been doing a makeover of my art room.....trying to turn a disaster area into something a little more organized.....and a little more "light and bright".  I moved my work table to the center of the room and changed my entire setup for making videos.  Unfortunately, I wasn't paying attention when I started my project, so the first half of the video is sideways.  I tried to flip it during editing, but it made the picture show up very thin.  I figured that sideways was better than thin.  So, please pardon the sideways half.

Here we go......


List of Supplies

10" X 14" canvas
Scrapbook paper
Decou-Page Matte
Golden Fluid Acrylics - Quinacridone Magenta, Green Gold
Americana Acrylics - Mustard Yellow, Chiffon Blue, Bleached Sand, Warm White, Titanium White, Dragon Fruit, Citron Green, Green
DecoArt Media Acrylics - Quinacridone Red, Raw Umber
F&W Acrylic Ink - Turqouise, Magenta
Golden Carbon Black Paint mixed with water in a Fineliner Bottle
Pigma Micron Black Pen
Black Charcoal Pencil
White Sakura Gellyroll Pen
Miscellaneous Stencils


Have a great Monday and a wonderful week.

PEACE!

Cyndi

Monday, May 2, 2016

New Post on Gel Press™ Blog - Little Wooden House


Today is my day to do a project for the Gel Press™ Blog.

I did a step-by-step tutorial for making a little wooden house with Gel Press™ prints.

Check it out!!    http://www.gelpressblog.com/little-gel-press-house/

PEACE!!

Cyndi


New Product - Flowers Painted with Oil Sticks


I tried a brand new product.....and I love it.  This is the first (and only) piece that I've tried so far, but I can see the possibilities.

R & F Oil Sticks.....sticks of oil paint.  These are not at all like crayons or oil pastels.  It's just oil paint in a stick.  I have avoided oil paints like the plague.  They scare me....all of those solvents and other things that you have to mix with it.  These were so easy.

I tried some flowers.  Like I said, I, definitely, need to practice with these.


They create so much texture on the canvas.  Love it!!!  However, from what I understand, they take about a week to dry.


PEACE!!

Cyndi