Showing posts with label jewelry. Show all posts

Friday, July 29, 2016

Gel Press® and ETI Earrings and More Blog Hop

Welcome to the ETI/Gel Press® Blog Hop.  The designers for both companies have been creating wonderful projects.  Please leave a comment on the Gel Press® blog and on the Resin Crafts blog as to which projects you found most interesting or inspiring.  One winner will be picked, at random, Sunday, July 31, 2016, at 10pm CST.  The winner will get both Petite sets of Gel Press® plates and ETI Jewelry Resin!  Hop now through Sunday! Winner must be 18 or over and live in the USA.  Good Luck!


Gel Press Petites and ETI Resin


I love making jewelry!  I've made a lot of pieces using my Gel Press® prints.

Earrings with Tiny Gems


Gel Press Jewelry


Supplies

Gel Press® prints - I chose similar colors, yet one is lighter.
Square earrings bezels
Tiny gems
Tweezer to pick up gems
Glue

Instructions

1.  Cut two squares to fit earrings

2.  Cut two smaller accent pieces for centers

3.  Dab a bit of glue in center of earring bezel and attach the square Gel Press® prints

4.  Brush a tiny bit of glue on back of accent print and attach to center of each earring

5.  Using tweezers to pick up each gem, dip in a bit of glue then attach to earrings, as desired.

6.  Give the glue 15 minutes to completely dry

7.  Squeeze Resin into cup up to the first line

8.  Squeeze Hardener into the same cup up to the second line

9.  Using the stick that comes in the ETI package, stir mixture thoroughly for 2 minutes, scraping the edges of the cup.  Then pour the mixture into the second cup and stir again.

10. Pour mixture into each earring up to the top.  Be very careful not to create bubbles.  If you do have a few bubbles, pop them immediately.  

11. Set your project aside and allow to completely harden. (at least 24, preferably 48 hours)

ETI looks cloudy when first poured, but it dries crystal clear and very, very hard.  That's what makes it great for jewelry.  However, do not let any of the mixture dry on your table, etc.  You will not be able to get it off!


Bracelet with Gems and Leather Strap

First, I made a Gel Press® print, using pink and purple paint.


Cut the paper to fit the bezel, and stamped the word "HOPE"


Attached the print to the bezel with a little glue. 


I added two tiny gems, filled the bezel with the ETI, using the instructions, above.

Added leather and....voila.....a cute little bracelet!!


Square Ring

I used the same process, except that I glued a black bead to the center of the Gel Press® print, then poured the ETI.


Earrings 
with a little stamping on the Gel Press® prints.


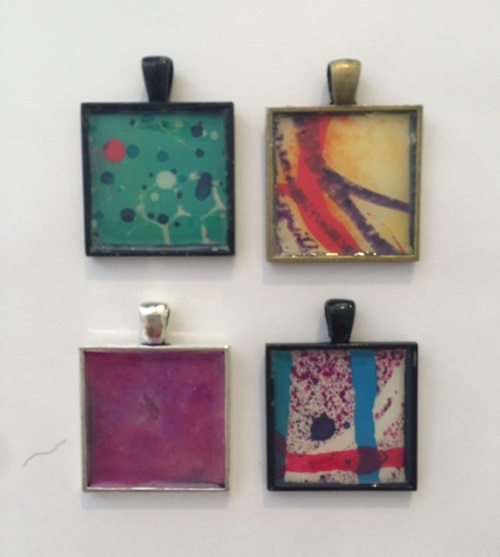
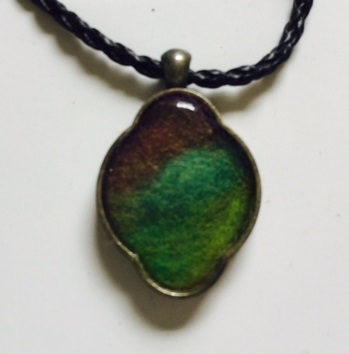
Pendants


And... another ring
this time cutting my prints into thin pieces and gluing them down to create a layered effect.


Watch out....this can become addictive.  I still have more ETI left!!

Now keeping hopping to see more great Gel Press® and ETI projects!


Visit us on Facebook - Gel Press® JunkiesPinterestYouTubeGel Press® Blog

PEACE!!

Cyndi Cesare
Gel Press® Creative Design Team


...


Tuesday, March 15, 2016

Gel Press™ Jewelry!!


I'm always looking for something else to do with my Gel Press™ plate.  Today, I worked on some quick prints for jewelry.  I went through a jewelry-making phase about 4 years.  I spent a lot of time at the bead store.  Then, I gave it up and gave most of my jewelry-making supplies to my sister.  But, today I felt urge!!

I started out by making two Gel Press™ prints on my 5" X 7" plate.  It only takes a little bit of paper and I'm going to cut it up into tiny pieces, so the prints are very random.


 Jewelry parts from the craft store - earrings and a pendant.


 Miscellaneous stencils and stamps.

Get your Gel Press™ Plate and brayer ready!

A couple small dabs of light purple and magenta (the colors in the photo aren't very accurate)


 Spread the paint out with the brayer.


I used sheet music for the gel prints.  Just place the paper on top of the painted plate, rub, rub, rub, and lift!!


Then a little off white and light blue on the plate.


 Brayer it out, then I used a foam stamp to pull some of the paint off.


Then, put the purple/magenta print back on the plate and pulled the second layer.


 Now for the base of the second print........................

A dab of blue and citron green paint.


 Brayer it out.


 Pull the gel print!


A little orange and pink back on the plate.

Brayer it out.


Added a couple stencils on top of the paint.

and, pulled the print on top of the blue/green gel print.


So, now I have these two Gel Press™ prints!


Next, I started stamping and doodling, randomly, on both prints until I felt that there were some interesting areas.  Remember, we are going to cut out little pieces for the jewelry.


To finish, I just cut out some areas that I liked, using the jewelry pieces as a template.  I used regular glue to adhere the gel print pieces to the jewelry.

For the earrings, I waited a while for the glue to dry, then covered them with the clear, adhesive pieces that came with the earring pieces.  I added my own earring wires (they were not included in the package).


(this pair needs some wires)


For the pendant, I added "Live Simply" with rub-ons before I cut it out.  Then, after waiting for the glue to dry, I covered the paper with Inkssentials Glossy Accents.  This pendant did not come with it's own cover.  the Glossy Accents provides a nice, shiny finish and seals the paper.  I'll probably hang this piece on a cord.


That's it!!!  It looks like a lot of steps, but it's really easy and the possibilites are endless.  Here are some pix of other pieces that I've made.


PEACE!!

Cyndi

Check out my YouTube Channel for lots of art and how-to videos!!